Key Takeaways
- Viewers tolerate poor video more than bad audio, making it crucial to improve live stream audio quality.
- The global live streaming market is projected to reach $97.39 billion by 2026.
- Distorted audio can make speakers seem less intelligent and credible, according to one study.
- Investing in a quality external microphone is the most impactful step to improve live stream audio quality.
- Consistent sound checks are essential to maintain high broadcast audio quality throughout a stream.
Are you pouring hours into creating amazing content, only to have viewers complain about the sound? It’s a common frustration, but the good news is you can significantly improve live stream audio quality without a massive budget. Viewers are far more forgiving of less-than-perfect visuals than they are of poor audio, making this a critical area to focus on for audience retention and engagement. This guide will walk you through proven strategies to elevate your stream’s sound.
Quick Answer: Use an external microphone, reduce background noise, optimize mic placement, adjust software settings, and conduct sound checks. Prioritize audio clarity over visuals for better viewer engagement to improve live stream audio quality.
Why is Live Stream Audio Quality So Important?
Investing time and resources to improve live stream audio quality isn’t just about sounding good; it’s fundamental to your stream’s success. In the competitive world of online content, viewers have numerous choices, and poor audio is a swift way to lose them. The global live streaming market is projected to reach $97.39 billion by 2026, emphasizing the scale of this industry and the need for professional presentation. Many viewers will tolerate a blurry image long before they abandon a stream due to bad sound, highlighting audio’s primary importance. This focus on better sound is crucial for anyone serious about building an audience and maintaining viewer loyalty.
The impact of audio quality extends beyond mere listenability; it influences perception. A study found that when audio sounded ‘tinny’ or distorted, participants perceived speakers as less intelligent, less credible, less hireable, and less likable. This is a stark reminder that your audio is a direct reflection of your professionalism. To truly improve live stream audio quality, you must understand that sound often conveys more emotion and information than visuals alone. It’s often the cheapest element to improve but yields the most significant return in perceived professionalism, making it a top priority for anyone aiming to enhance their broadcast audio quality.
What most people miss is that excellent audio is often the gateway to viewer trust. When your sound is clear and consistent, it signals that you’ve put thought and effort into your production. This builds confidence in your content and your brand. To improve live stream audio quality effectively, you need to treat it with the same importance as your video feed. This foundational understanding is the first step toward achieving broadcast audio quality.
The Viewer Experience Impact
Viewers are highly sensitive to audio issues. Crackling, background hum, echo, or muffled speech can make content unwatchable, regardless of how engaging the on-screen action is. This directly impacts watch time and viewer retention, two key metrics for any streamer. Focusing on how to get better sound on stream is therefore a direct investment in keeping your audience engaged.
- Viewers are significantly more likely to abandon a stream with poor audio than one with mediocre video.
- Bad audio can lead to misinterpretation of your message, frustrating your audience.
- A clear stream audio setup enhances the overall professional image you project.
Market and Professionalism
As the live streaming market continues its rapid expansion, the expectation for professional-grade content grows. To improve live stream audio quality means aligning your production with these rising standards. Achieving excellent sound is a key differentiator. It demonstrates respect for your audience’s time and attention. This is why many experts state that audio quality is the single biggest factor in perceived “professionalism” and is often the cheapest to improve. This principle is vital for anyone looking to improve live stream audio quality and stand out.
How to Improve Live Stream Audio with Better Microphones
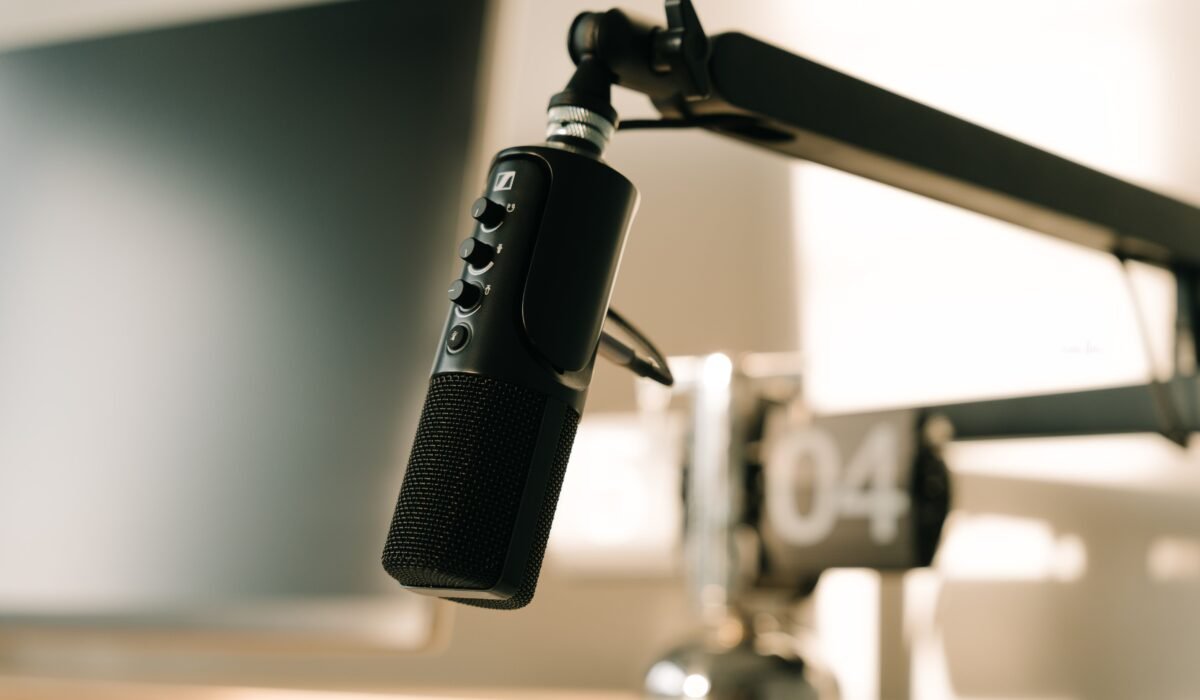
The most impactful way to improve live stream audio quality is by upgrading your microphone. Relying on built-in laptop or webcam mics is a common pitfall that severely limits your audio potential. Investing in an external microphone is the single most crucial step toward achieving clearer, richer sound for your broadcasts. This foundational piece of gear directly captures your voice, making it the primary tool for enhancing your stream audio setup.
When selecting a microphone, consider your needs and budget. For many streamers, a USB microphone offers a straightforward plug-and-play solution. Models like the Elgato Wave:3 are excellent choices, offering broadcast-quality sound and built-in features like a limiter to prevent distortion, which is invaluable for improving live stream audio quality. For those seeking an industry-standard, professional XLR setup, the Shure SM7B is a legendary choice, though it requires an audio interface like the Focusrite Scarlett series. Understanding these options helps you make an informed decision to improve live stream audio quality.
Beyond specific models, the type of microphone matters. Condenser microphones are generally more sensitive and capture finer details, making them great for voice-over work and studio environments, but they can also pick up more background noise if not managed carefully. Dynamic microphones, like the Shure SM7B, are more robust and better at rejecting background noise, often making them ideal for louder environments or when you need to improve live stream audio quality by isolating your voice. Choosing the right microphone is the first major step to improve live stream audio quality.
Here’s a look at how different microphone types and setups can enhance your stream:
- USB Microphones: Easy to set up, directly connect to your computer. Great for beginners aiming to improve live stream audio quality. Examples include the Elgato Wave:3 and Rode NT1 (available in USB variants).
- XLR Microphones: Require an audio interface or mixer, offering more control and often superior sound quality. This path is excellent for those serious about achieving top-tier broadcast audio quality.
- Dynamic Microphones: Durable, good at rejecting background noise, ideal for less-than-perfect acoustic environments. Essential for streamers who need to isolate their voice to improve live stream audio quality.
- Condenser Microphones: Highly sensitive, capture detailed sound. Best suited for quiet, treated rooms where you want to capture every nuance. Crucial for achieving pristine sound if you want to improve live stream audio quality in specific settings.
Consider the Rode NT1 5th Gen for its versatility, offering both USB and XLR connectivity, making it a flexible option for those looking to improve live stream audio quality across different setups. The best microphone for streaming audio often depends on your specific environment and budget, but an upgrade from your built-in mic is non-negotiable for anyone serious about their stream audio setup.
Microphone Recommendations
Choosing the right microphone is key to improving live stream audio quality. The Elgato Wave:3 is a fantastic USB microphone that offers studio-quality sound and features designed specifically for streamers, like its built-in clipguard to prevent clipping and distortion. This makes it an excellent option for those looking to quickly improve live stream audio quality with minimal fuss.
For creators aiming for that professional broadcast audio quality, the Shure SM7B is an industry-standard XLR microphone. While it demands more investment, including an audio interface like the Focusrite Scarlett series, its ability to capture rich, warm vocals and reject ambient noise is unparalleled. This setup is a significant leap for anyone wanting to truly improve live stream audio quality and achieve a polished sound.
Optimizing Your Environment to Reduce Background Noise
Even with the best microphone, ambient noise can severely degrade your audio, making it imperative to optimize your recording environment to improve live stream audio quality. Background sounds like traffic, household appliances, pets, or even echoes can distract viewers and reduce the perceived professionalism of your stream. Tackling noise at its source is a proactive strategy to improve live stream audio quality before it ever reaches your microphone.
The first step is identifying your noise sources. Is it a humming computer fan, a noisy air conditioner, or sounds from outside? Simple solutions can make a big difference. For instance, closing windows and doors can block external noise. Turning off non-essential appliances or scheduling your stream during quieter times can also help. These practical steps are fundamental to how to get better sound on stream by minimizing unwanted interference.
For acoustic noise, such as echo and reverb, consider the materials in your room. Hard surfaces like bare walls, windows, and hardwood floors reflect sound, creating an echoey effect. To improve live stream audio quality, introduce soft, sound-absorbing materials. This can include thick curtains, rugs, upholstered furniture, and even bookshelves filled with books. These elements help to deaden the room and reduce reverberation, leading to a clearer, more focused sound that enhances your stream audio setup.
Here are effective ways to treat your recording space:
- Minimize External Noise: Close windows and doors. Consider the timing of your stream to avoid peak traffic or neighborhood noise. This is a simple yet effective way to improve live stream audio quality.
- Address Room Acoustics: Soft furnishings like carpets, curtains, and fabric wall hangings absorb sound reflections. This reduces echo and makes your voice sound clearer, a key aspect of improving live stream audio quality.
- Reduce Appliance Noise: Turn off fans, air conditioners, or other noisy devices during your stream. If possible, place your computer and other equipment away from your microphone. This directly helps to fix live stream audio problems related to ambient hums.
- DIY Solutions: Hanging blankets or duvets on walls can temporarily improve acoustics and reduce echo. While not as effective as professional acoustic panels, they are a budget-friendly way to improve live stream audio quality.
Professional acoustic treatment, such as foam panels or bass traps, offers the most significant improvement for broadcast audio quality but comes at a higher cost. However, even basic steps to optimize your environment can dramatically improve live stream audio quality. From experience, even a simple rug and some strategic placement of soft items can make a night-and-day difference for your stream audio setup.
Acoustic Treatment Options
To truly improve live stream audio quality, treating your room’s acoustics is vital. Hard surfaces reflect sound waves, creating echo and reverb that muddy your voice. Introducing soft materials like thick curtains, rugs, or even strategically placed bookshelves helps absorb these reflections. This is a crucial step for anyone aiming for professional broadcast audio quality.
For a more dedicated approach, consider acoustic panels. These are designed to absorb specific frequencies and significantly reduce echo. Brands like GIK Acoustics offer solutions, and even DIY panels can be effective. Implementing these can dramatically improve live stream audio quality by creating a more controlled sound environment for your microphone.
Mastering Mic Placement for Clearer Sound
Proper microphone placement is a critical, often overlooked, factor in how to get better sound on stream and improve live stream audio quality. Even with a great microphone, incorrect positioning can lead to muffled speech, excessive plosives (those harsh ‘p’ and ‘b’ sounds), or a thin, distant vocal tone. Mastering mic placement is a fundamental skill for achieving clear, present audio that enhances your viewer’s experience and elevates your stream audio setup.
The ideal distance from your mouth to the microphone depends on the mic type and your desired sound. Generally, for most broadcast microphones like the Shure SM7B or even USB mics like the Elgato Wave:3, maintaining a distance of about 4 to 8 inches (10-20 cm) is a good starting point. This range captures your voice clearly without being too close, which can cause distortion or plosives, or too far, which can pick up more room noise and sound distant. This distance is key to improving live stream audio quality.
Another crucial aspect is the microphone’s angle relative to your mouth. For dynamic microphones, speaking directly into the front of the mic is standard. However, for some microphones, especially condensers, or to reduce plosives, using an “off-axis” technique (speaking slightly across the front of the mic rather than directly into it) can be beneficial. Experimenting with these angles is part of learning how to get better sound on stream. You might also consider using a pop filter or windscreen, which are specifically designed to mitigate plosive sounds and are essential tools to improve live stream audio quality.
Here’s a guide to optimizing your mic placement:
- Distance is Key: Aim for 4-8 inches (10-20 cm) from your mouth to the microphone. This balance captures your voice clearly while minimizing room noise and plosives. This is a core technique to improve live stream audio quality.
- Angle Matters: Experiment with speaking directly into the mic or slightly off-axis. Off-axis placement can help reduce harsh ‘p’ and ‘b’ sounds (plosives). This is vital for optimizing your stream audio setup.
- Use a Pop Filter: A pop filter or windscreen placed between your mouth and the microphone significantly reduces plosive noise, making your audio much cleaner. This is a simple but powerful way to improve live stream audio quality.
- Mic Height: Position the microphone so it’s slightly below or at the level of your mouth, rather than directly in front and below, to further reduce plosive issues. This adjustment helps to fix live stream audio problems related to breath and pops.
The goal is to create an intimate, clear vocal presence without introducing unwanted artifacts. Consistent mic placement is a habit that will pay dividends in your ability to improve live stream audio quality over time. Remember, even the best microphone for streaming audio needs to be positioned correctly to perform at its peak.
Plosives and Sibilance
Plosives (harsh ‘p’ and ‘b’ sounds) and sibilance (sharp ‘s’ sounds) are common issues that degrade audio quality. To improve live stream audio quality and combat these, direct mic placement and pop filters are essential. An off-axis technique, where you speak slightly past the microphone rather than directly into it, can also dramatically reduce these unwanted sounds.
For example, using a pop filter with your Rode NT1 5th Gen or any other microphone is a simple, inexpensive way to significantly clean up your audio. This small accessory is crucial for anyone looking to improve live stream audio quality and avoid common vocal artifacts.
Leveraging Streaming Software for Audio Enhancement
Once you have your hardware set up, the next crucial step to improve live stream audio quality is to leverage the features within your streaming software. Platforms like OBS Studio offer powerful tools to fine-tune your audio, apply filters, and ensure your sound is balanced and professional. Understanding these settings is key to how to get better sound on stream and move beyond basic audio capture.
OBS Studio, a free and open-source option, provides a robust audio mixer where you can adjust individual track volumes, including your microphone, desktop audio, and alerts. This allows you to ensure your voice is always the most prominent element, even when game audio or other sound effects are present. Setting up your stream audio setup correctly within OBS is vital for a polished broadcast.
Beyond basic volume control, OBS Studio offers audio filters that can significantly enhance your sound. Filters like Noise Suppression, Noise Gate, and Compressor are invaluable for improving live stream audio quality. Noise Suppression helps to reduce constant background hums, while a Noise Gate can cut out audio when your microphone is below a certain threshold, effectively silencing background noise when you’re not speaking. A compressor evens out volume levels, making quiet parts louder and loud parts quieter, resulting in a more consistent and pleasant listening experience.
Here’s how software settings help you improve live stream audio quality:
- Volume Balancing: Use the audio mixer in OBS Studio or other software to ensure your voice is louder than game audio or music. This prioritizes your commentary, a key aspect of improving live stream audio quality.
- Noise Suppression: Apply a noise suppression filter to remove consistent background noise like fans or air conditioners. This is a direct method to fix live stream audio problems related to ambient sounds.
- Noise Gate: Configure a noise gate to mute your microphone when sound levels drop below a set threshold, effectively eliminating background noise during silences. This is crucial for a clean stream audio setup.
- Compressor: Use a compressor to even out volume fluctuations, making your voice sound more consistent and professional. This helps achieve broadcast audio quality even with varying vocal dynamics.
- EQ (Equalization): Advanced users can use EQ to boost or cut specific frequencies, shaping the tone of their voice for clarity and warmth. This is a powerful tool to improve live stream audio quality for specific voices.
Many streaming platforms and broadcasting software also offer advanced audio settings. For example, if you’re using an audio interface like the Focusrite Scarlett, you might have software control over pre-amp gain and phantom power. Learning to navigate these settings is part of the journey to improve live stream audio quality and achieve professional results. Proper OBS audio settings are non-negotiable for a great stream.
OBS Studio Audio Filters
OBS Studio’s built-in audio filters are powerful tools to improve live stream audio quality. The ‘Noise Suppression’ filter is excellent for reducing constant background hums from fans or equipment. For more dynamic control, a ‘Noise Gate’ can silence your mic when you’re not speaking, preventing ambient sounds from leaking through. These filters are fundamental for anyone looking to improve live stream audio quality.
Using a compressor filter can also greatly enhance your audio by evening out volume levels. This ensures that quiet whispers and loud shouts are perceived at a more consistent level, making your stream more pleasant to listen to. Mastering these OBS audio settings is a key step to achieving professional broadcast audio quality and improving live stream audio quality.
Essential Sound Checks Before Going Live
Before you hit the ‘Go Live’ button, performing thorough sound checks is absolutely essential to improve live stream audio quality and ensure a smooth broadcast. This final step is your safety net, catching any issues that might have slipped through during setup and guaranteeing that your audience experiences the best possible audio. Skipping this can lead to embarrassing problems that require immediate attention mid-stream, which is stressful and detracts from your content. These checks are paramount for anyone wanting to improve live stream audio quality.
The most basic sound check involves speaking into your microphone at a normal volume and listening back. However, a more comprehensive check involves recording a short segment of yourself speaking, playing back games, or interacting with any other audio sources you’ll have during the stream. This recorded test allows you to critically evaluate your audio without the pressure of a live audience. It’s the most direct way to diagnose and fix live stream audio problems before they occur.
Pay attention to several key aspects during your sound check. First, check your microphone levels. In OBS Studio or your streaming software, ensure your voice levels are peaking in the yellow range, occasionally touching the orange, but never hitting the red, which indicates clipping and distortion. This balance is crucial for improving live stream audio quality. Second, listen for background noise. Can you hear your computer fans, air conditioning, or external sounds? If so, revisit your environment optimization and software settings to further improve live stream audio quality.
Here’s a checklist for your pre-stream sound check:
- Microphone Levels: Speak at your normal broadcast volume and check your levels in the software mixer. Aim for consistent levels in the yellow/orange range. This is vital to improve live stream audio quality.
- Background Noise Scan: Record a minute of silence (or just ambient room noise) and listen back. If you hear unwanted hums, hisses, or other distractions, address them. This helps to fix live stream audio problems.
- Full Audio Mix Test: If you have game audio, music, alerts, or other sound sources, test them all. Ensure your voice is clear and dominant over other sounds. This is fundamental to a good stream audio setup.
- Playback Test: Record a short segment of your actual stream content (e.g., talking while playing a game). Listen to the recording to catch any issues you might have missed. This is a crucial step to improve live stream audio quality.
- Test with Friends: If possible, do a private test stream or use a voice chat with a friend to get live feedback on your audio quality. This provides real-time insights into how to improve live stream audio quality.
Consistency is key when you improve live stream audio quality. Making these sound checks a non-negotiable part of your pre-stream routine will save you from many potential audio disasters and ensure your audience enjoys a professional listening experience every time. This diligence is what separates amateur streams from those that achieve broadcast audio quality.
Checking and Adjusting Levels
Your microphone’s audio levels need to be set correctly to improve live stream audio quality. In OBS Studio, this means ensuring your voice peaks are consistently within the optimal range (typically yellow or low orange on the meter). If levels are too low, your voice will sound distant and require viewers to turn up their volume, potentially amplifying background noise. If they are too high, you risk clipping, which causes distortion and makes your audio unlistenable.
A quick test involves speaking normally into your microphone while watching the audio meter. Record a short clip of yourself talking and playing a game if applicable. Play it back to ensure your voice is clear, present, and free from distortion. This simple playback test is a powerful way to ensure you improve live stream audio quality before going live.
Frequently Asked Questions
What is the most important element of a live stream?
The most important element of a live stream is arguably audio quality, as viewers often leave streams with poor sound. Improving live stream audio quality is paramount for viewer retention and engagement. Prioritize clear sound over perfect visuals to keep your audience tuned in.
How do I improve audio quality on OBS?
To improve audio quality on OBS Studio, use an external microphone, apply filters like Noise Suppression and Compressor, balance volumes in the audio mixer, and ensure proper mic placement. These steps are essential for achieving better sound on stream and enhancing broadcast audio quality.
What is the best microphone for live streaming?
While “best” is subjective, popular choices for streamers include the Elgato Wave:3 for USB convenience and features, and the Shure SM7B for professional XLR setups. Investing in a quality microphone is the most significant step to improve live stream audio quality.
How do I stop echo in my live stream?
To stop echo and improve live stream audio quality, treat your room with sound-absorbing materials like curtains, rugs, or acoustic panels. Reducing the number of hard, reflective surfaces will minimize reverberation. This is a key tactic for optimizing your environment to reduce background noise.
What settings should I use for live stream audio?
For optimal live stream audio quality, aim for microphone levels that peak in the yellow/orange range in your software, use noise suppression and gates to manage background noise, and employ a compressor to even out volume. Conducting thorough sound checks is critical to dial in these settings and improve live stream audio quality.
Consistently applying these strategies will help you dramatically improve live stream audio quality. From selecting the right microphone like the Rode NT1 5th Gen or Shure SM7B, to optimizing your recording space, mastering mic placement, and fine-tuning your software settings in OBS Studio, every step contributes to a more professional broadcast. Don’t underestimate the power of clear sound; it’s often the deciding factor in whether viewers stay engaged or click away. Make improving your stream audio setup a top priority.
By focusing on these actionable tips, you can transform your live stream audio from a weakness into a strength. Start by investing in a better microphone, then tackle your environment and software settings. Regular sound checks will ensure you maintain high broadcast audio quality consistently. Taking these steps will not only help you fix live stream audio problems but will also elevate your entire streaming experience and audience engagement.